
How to set the monthly pay period on the Seiko QR-395
When choosing a monthly pay period, the Seiko QR-395 provides 5 different card types. These card types determine the style of time card used, the number of clockings available per day and whether or not calculations are performed.
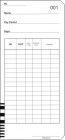
Card Type C1
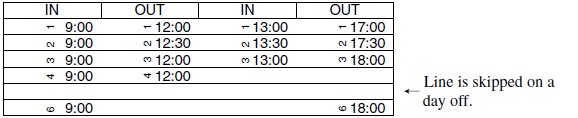
The C1 card type utilises the barcoded time card.
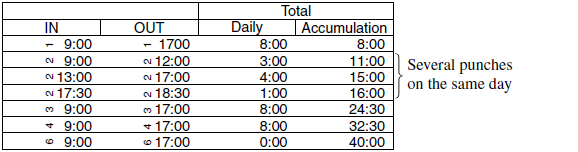
This card type provides multiple clockings per day, however, you can only have two clockings per row (IN/OUT). Calculation of hours and minutes is performed on each row in column 3, along with a running total for the month in column 4.
Card Type C2
The C2 card type utilises the barcoded time card.
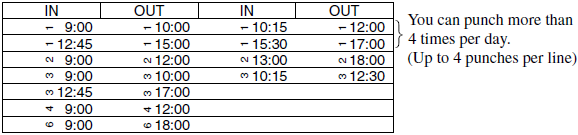
This card type provides multiple clockings per day, however, you can only have four clockings per row (IN/OUT, IN/OUT). Calculations are not performed with this card type.
Card Type C3
The C3 card type utilises the barcoded time card.
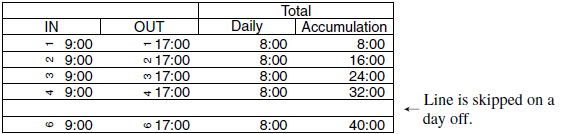
This card type provides one day per row and you can have two clockings per row (IN/OUT). Calculation of hours and minutes is performed on each row in column 3, along with a running total for the month in column 4. Rows are skipped for days that have no clockings.
Card Type C4
The C4 card type utilises the barcoded time card.
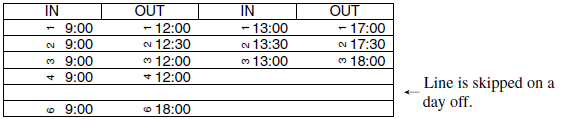
This card type provides one day per row and you can have four clockings per row (IN/OUT, IN/OUT). Calculations are not performed with this card type. Rows are skipped for days that have no clockings.
Card Type C5
The C5 card type utilises the traditional monthly time card.
This card type provides one row per day and you may have four clockings per row. Calculations are not performed with this card type. Rows are skipped for days that have no clockings.
In this example, we will be using card type C1 and programming the pay period to monthly, ending on the 20th of each month.
If you need to set or alter the pay period to monthly on your Seiko QR-395 time clock, follow the procedure below.
Card Type C1
The C1 card type utilises the barcoded time card.
This card type provides multiple clockings per day, however, you can only have two clockings per row (IN/OUT). Calculation of hours and minutes is performed on each row in column 3, along with a running total for the month in column 4.
Card Type C2
The C2 card type utilises the barcoded time card.
This card type provides multiple clockings per day, however, you can only have four clockings per row (IN/OUT, IN/OUT). Calculations are not performed with this card type.
Card Type C3
The C3 card type utilises the barcoded time card.
This card type provides one day per row and you can have two clockings per row (IN/OUT). Calculation of hours and minutes is performed on each row in column 3, along with a running total for the month in column 4. Rows are skipped for days that have no clockings.
Card Type C4
The C4 card type utilises the barcoded time card.
This card type provides one day per row and you can have four clockings per row (IN/OUT, IN/OUT). Calculations are not performed with this card type. Rows are skipped for days that have no clockings.
Card Type C5
The C5 card type utilises the traditional monthly time card.
This card type provides one row per day and you may have four clockings per row. Calculations are not performed with this card type. Rows are skipped for days that have no clockings.
To end the pay period on the last day of each month, program the closing date to 31.
In this example, we will be using card type C1 and programming the pay period to monthly, ending on the 20th of each month.
If you need to set or alter the pay period to monthly on your Seiko QR-395 time clock, follow the procedure below.
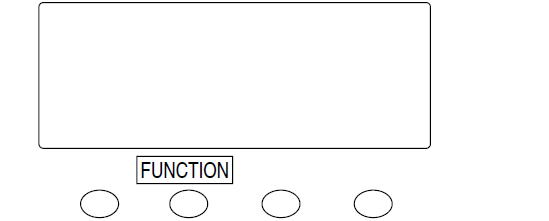
- If you haven't already done so, with power applied to the Seiko QR-395, unlock and remove the top cover. This will enter program mode.
- Press and hold the FUNCTION button for 3-5 seconds until you hear a second beep. After the second beep, release the FUNCTION button. This will enter the first function option.
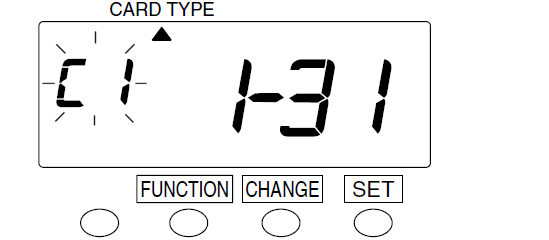
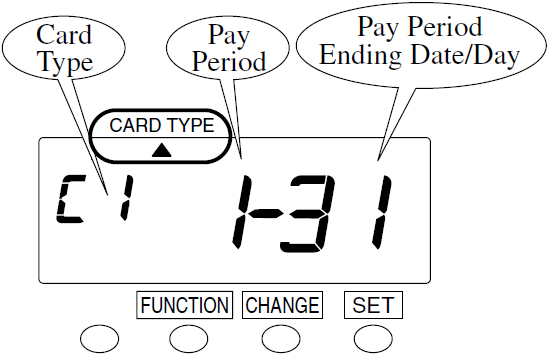
- Press the FUNCTION button as required to position the "" mark under the CARD TYPE option.
- Initially, the card type option value will be flashing. If necessary, press the CHANGE button to alter the card type option value to read C1 for card type C1.
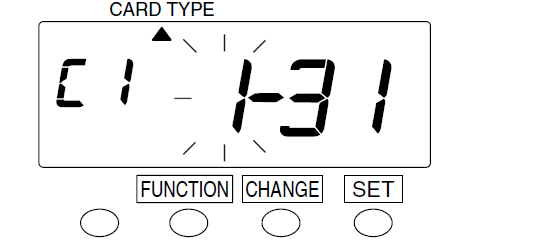
Press the SET button to proceed to the pay period. - The pay period option value will now be flashing. If necessary, press the CHANGE button to alter the pay period option value to read 1 for monthly.
If you have chosen card type C5, the pay period option is not selectable. You can jump ahead to step 6.
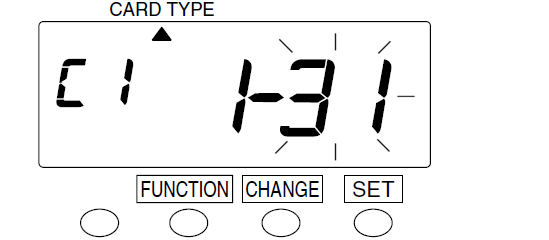
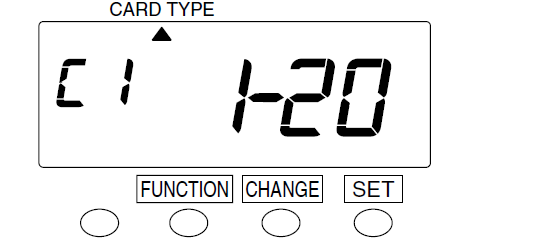
Press the SET button to proceed to the closing date. - The closing date value will now be flashing. If necessary, press the CHANGE button to alter the closing date to read 20 for the 20th of the month.
Press the SET button to complete the procedure. - If you don't need to alter any further settings, press SET one more time to ensure you have exited program mode.
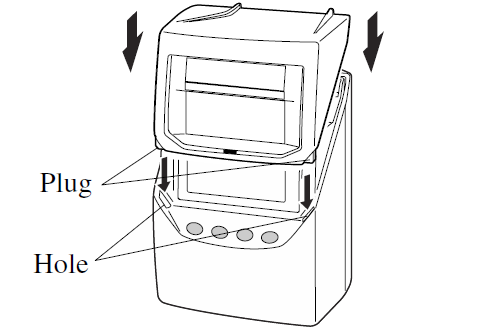
- Replace and lock the top cover.


If the display shows "9999" when entering function program mode, you are required to enter the four digit password to proceed.
See How to input the password on the Seiko QR-395 for more information.
See How to input the password on the Seiko QR-395 for more information.
If the display shows error "E-49" when attempting to set the new pay period, you are required to perform an all cards reset before proceeding.
See Error E-49 displayed on the Seiko QR-395 and How to perform an all cards reset on the Seiko QR-395 for more information.
See Error E-49 displayed on the Seiko QR-395 and How to perform an all cards reset on the Seiko QR-395 for more information.
If you don't press the SET button to complete programming, the QR-395 will remain in program mode and will not accept time cards.
Last updated on Friday, 15 February 2019
Related articles...
Related products...

Replacement purple ribbon cartridge for the Seiko QR-350, QR-375 and QR-395 time clocks. more details...

Replacement key for the Seiko QR-395 calculating time clock. more details...
Two-sided weekly, bi-weekly or monthly attendance/payroll time card for the Seiko QR-375, Seiko QR-395, Lathem 7000E, Lathem 7500E and compatible time clocks.
Available in four quantities: box of 1000, box of 800, box of 500 and packet of 100. more details...