
How to set daylight saving time on the Seiko Z120
In this example, we will be using Australian daylight saving time.
Start: 7 October, 2018 (First Sunday in October)
End: 7 April, 2019 (First Sunday in April)
Start: 7 October, 2018 (First Sunday in October)
End: 7 April, 2019 (First Sunday in April)
If you need to set or alter the daylight saving time (DST) setting on your Seiko Z120 time clock, follow the procedure below.
If you are already in program mode and are continuing from a previous function option, you can jump ahead to step 5.
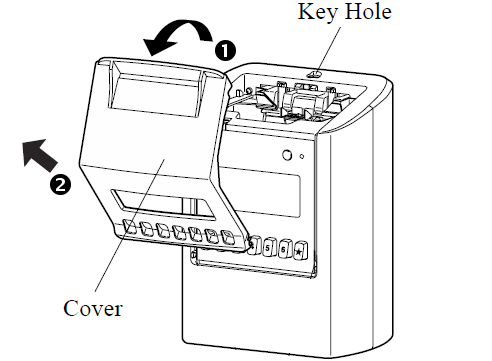
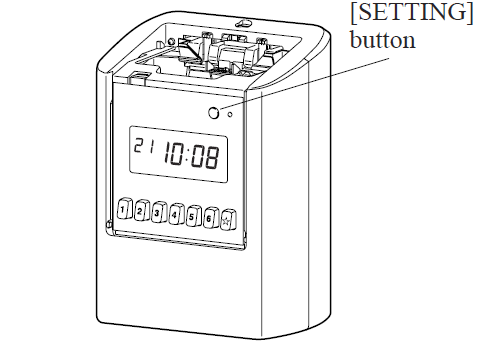
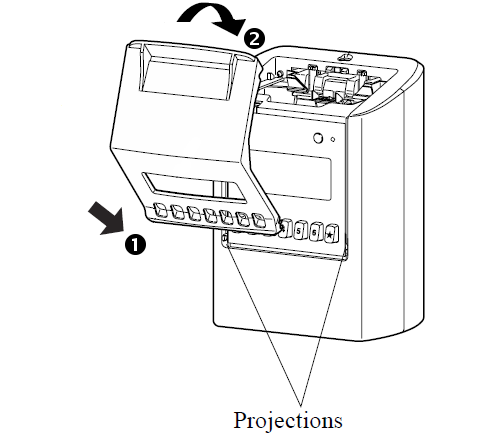
- With the power applied to the Seiko Z120, unlock and remove the cover.
- Press the SETTING button once. This will enter program mode.
- Once in program mode, the display will show " ".
- Press and hold the FUNCTION button for 1-2 seconds. This will enter the first function option.
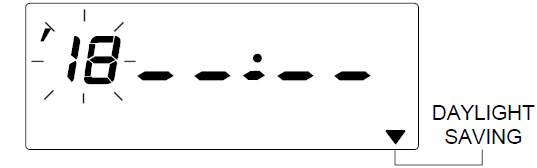
- Press the FUNCTION button as required to position the "" mark above the DAYLIGHT SAVING option.
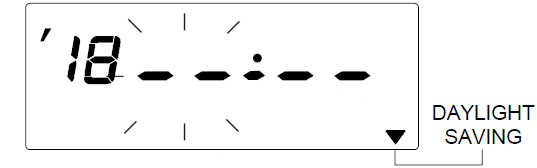
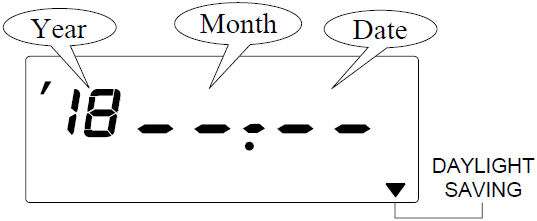
- Initially, the year value will be flashing. If necessary, press the or buttons to alter the year to read '18 for 2018.
Press the SET button to proceed to the month. - The month value will now be flashing. If necessary, press the or buttons to alter the month to read 10 for October.
Press the SET button to proceed to the date. - The date value will now be flashing. If necessary, press the or buttons to alter the date to read 7 for the 7th day of the month.

Press the SET button to complete the procedure.
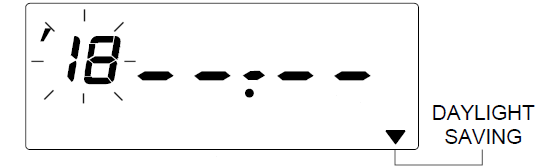
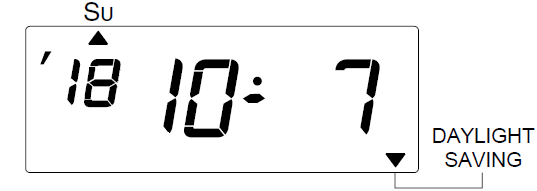
The date will stop flashing and the "" mark will be positioned under Su (Sunday). The start date of daylight saving time is now set. - After a short period, the screen will change and the dot in the centre of the display will be below the dash. This indicates we are now programming the end date of daylight saving time.
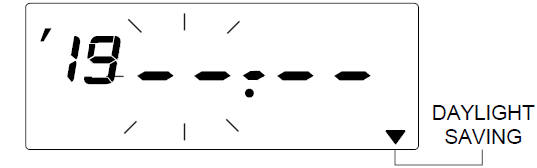
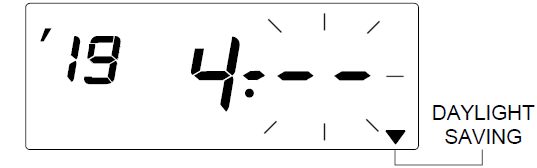
- Initially, the year value will be flashing. If necessary, press the or buttons to alter the year to read '19 for 2019.
Press the SET button to proceed to the month. - The month value will now be flashing. If necessary, press the or buttons to alter the month to read 4 for April.
Press the SET button to proceed to the date. - The date value will now be flashing. If necessary, press the or buttons to alter the date to read 7 for the 7th day of the month.
Press the SET button to complete the procedure.
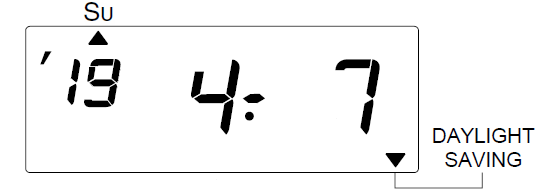
The date will stop flashing and the "" mark will be positioned under Su (Sunday). The end date of daylight saving time is now set. - If you don't need to alter any further settings, press the SETTING button once. This will exit program mode.
- Replace and lock the cover.


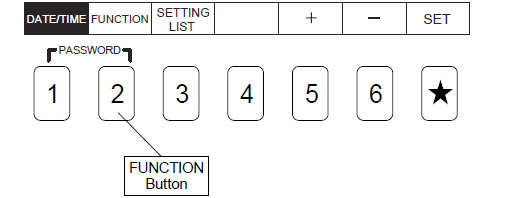
If the display shows "9999" when entering function program mode, you are required to enter the four digit password to proceed.
See How to input the password on the Seiko Z120 for more information.
See How to input the password on the Seiko Z120 for more information.
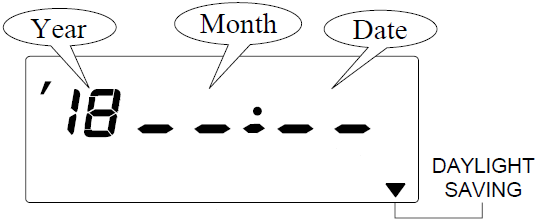
In this section we will be programming the start date of daylight saving time (7 October, 2018).
In this section we will be programming the end date of daylight saving time (7 April, 2019).
If you don't press the SETTING button to complete programming, the Z120 will remain in program mode and will not accept time cards.
Last updated on Monday, 8 October 2018
Related articles...
Related products...

Replacement black ribbon cartridge for the Seiko TP-5, TP-10, TP-10II, TP-10X, TP-15, TP-20, TP-50, QS-100 and Z120 time clocks. more details...

Replacement key for the Seiko Z120 time clock. more details...